During seasonal preparations, other than celebration, you can add some variety to this khichudi by adding vegetables like cauliflower, green peas, beans, carrots, depending on your taste. This will make it sumptuous and mouth-watering.
Preparing Process:
• The specialty of Bengali khichudi is to fry their dal before they cook it. So before preparing the khichudi and mixing the dal and rice, it is better, if the dal is roasted a bit on dry heat in a vessel.
• The dal should be roasted to the right extent; otherwise the burning smell will leave a strange odour in the recipe. So utmost care should be taken while roasting the Dal. Moong Dal is roasted very quickly and starts leaving a nutty aroma when it is roasted. When the nutty aroma starts appearing, it is the indication, which the dal is prepared for cooking. After transferring the dal in a bowl, it is allowed to cool. In the meantime, the vessel is filled with two table-spoon oil.
• I prefer to use mustard oil, however, nowadays, health conscious people, like to use low-cholesterol versions. Hence, it is simply your choice, which oil to use. Fry the potatoes and cauliflower florets nicely and when they turn reddish brown, transfer them to another plate.
• Now, take oil in the pressure cooker and take one tablespoonful of ghee. Let it get heated and add cumin seeds and whole dried red chillies, one bay leaf and the whole garam masala. When the cumin seeds start spluttering, stir it and add the tomatoes and ginger paste. Be careful of the spluttering and keep the gas in a low flame. When the tomatoes leave the water content, add little salt, add turmeric powder, and red chilli powder. At this time, you may have to add little water so that the masala is not burnt. Keep on stirring and add the rice, dal, green peas, at this moment.
• Add 5 glasses of water. Mix them generously. Add the green chillies and fried vegetables. Stir it again and then close the lid of the pressure cooker. Pressure cook it for 3-4-whistles and give time for the last whistle to cool down for 5-10 minutes. The Khichudi is ready. Before taking down add 1-table-spoon of ghee, which adds an extra flavour, and mouth-watering feeling to your dish. Garnish with green chillies and sliced tomatoes.
3. Masala Cabbage Preparation as an Accompaniment of Khichudi:
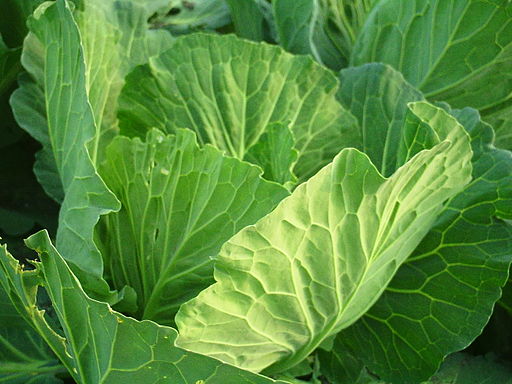
The khichudi remains incomplete if it is not accompanied with masala cabbage curry, which in Bengali is popularly known as 'Bandakopir Dalna'. This is a tasty dish, which involves the seasonal cabbage, cooked with green peas and potatoes. Bengali people love to include potatoes in most of their recipes and as I have noticed, the inclusion of potato induces a special taste. However, for those, who are diabetics, or are carbohydrate conscious, you may exclude potatoes if you wish. The taste of the recipe will not differ. This recipe is not only prepared during the pujas, but also during the winter season. The dish goes well with steamed basmati rice, roti, paratha, fulkas, chapatti, etc.
Ingredients:
Preparation Time: 45 minutes
Servings: 3-4
• Cabbage: 1 whole leafy and green (please look for the fresh green and small ones)
• Potatoes: Two (diced to four equal squares, in total 8 pieces), I prefer to add potatoes, hence I am including the potatoes.
• Green Chilly: 3-4
• Red Dried Chilly: 1-Whole
• Bay Leaf: 1-Dried
• Cumin Seeds: 1-Tea-spoon
• Ginger Paste: (1/2-piece ginger grated), I like the dish to have gingery aroma. You can adjust it according to your palatability to ginger.
• Garlic paste: ¼-tea-spoonful (just to avoid the raw smell of cabbage)
• Green Peas: ½-cup (use fresh ones)
• Tomatoes: 1-full sliced finely
• Turmeric Powder: ½-tea-spoon
• Cumin Powder: ¼-tea-spoon
• Red-chilli powder: ½-tea-spoon
• Salt and Sugar to taste
• Water to Mix
• Garam Masala Powder
• Oil: 3-Table-spoon
• Ghee: 2-table-spoon
Process of Making:
• Chop the cabbage into thin pieces (it will allow cooking easily).Wash them thoroughly under a strainer and immerse them in a deep vessel with water. Add little salt and turmeric and allow the water to get heated along with the chopped cabbage.
• When the water gets heated (not boiled), take down the vessel and allow it to cool. After cooling, separate the water from the vegetables using the strainer and keep them aside.
• In a wok, heat oil (Mustard oil or groundnut oil) and fry the potatoes nicely. Then add cumin seeds, bay leaves, and dry red chilly. Add ¼-tea-spoon sugar. The addition of sugar brings a good color and aroma. When the sugar starts leaving a reddish colour, and cumin seeds start spluttering, add tomatoes, and give it a stir. Add a little salt to increase the boiling point. After 2-3-minutes heating under a low flame, add ginger paste and garlic paste and keep on stirring. Mix well and take care so that the ingredient is not burnt.
• When the tomatoes start leaving the water and get well mixed then add cabbages, potatoes and green peas, which you have kept aside. Mix them well. Take care while mixing and give a generous up to down mixing because, some cabbage leaves may stick to the bottom of the pan, giving a burnt favor later on. Add dried spices, little garam masala, and salt to taste at this point and cover the vessel with a lid which has a small opening to let the steam flow out. Allow to cook, under medium heat for 10-minutes. If the cabbage is a seasonal one, then it will leave its inner water content and will cook in its own water content. However, nowadays, most of the cabbages are not seasonal varieties. Hence, while covering the lid, you may have to add 2-3 cups of warm water. Always add warm water to the curry while any preparation, otherwise, cold water may cause a temperature imbalance, due to which the vegetable may appear tasteless. After 10-15 minutes, check by opening the lid. If the cabbage is boiled properly, then dry the extra water by opening the lid and meanwhile, add some garam masala,
ghee before transferring and serving hot. Garnish it with, green chilies.
4. Stuffed Pointed Gourd Curry:
The 'Nobomi' night is well known for friends and family gathering, gearing up for the next day Vijaya Dashami preparations. Hence, I remember, my mom and grandmother always remained busy in preparing the 'Pancha Vyanjan' (five types of preparations, including non-vegetable items) for dinner. The fish, mutton and chicken curries are always prepared. Various vegetable items include pointed gourd, which is one of my favourites. I am not delving any further with non-vegetable items, and straightaway coming to the special preparation of parwal/potol/pointed gourd. Generally, I don't like the pointed gourd prepared in a customary manner with potatoes and garam masala curry, however, the stuffed part adds a special taste to the curry, which makes the recipe all the more interesting and delicious than normal. Parwal is mostly available in India during summers and is easy to cook, peel and stuff. The stuffing can be made of any vegetable or non-veg items. Among veg-items, the stuffing can include, grated and slightly roasted coconut, potatoes boiled etc, and among non-veg-items, the stuffing can be made of prawns fried and finely crushed to make a stuffing, or of any fish, chicken keema or mutton keema (pre-cooked). However, during the pujas, I prefer the stuffing of coconut. The smell of coconut and flavour of coconut milk adds a special aroma in the dish. Let me share with you, this authentic Bengali dish. However, the concept of dolma, came from the Portuguese culture.
Ingredients:
Preparation Time: 1 Hour
Servings: 4 Persons (1 Each)
• Pointed Gourd: Four (fresh and green ones)
• Coconut: Grated (1/3-cup)
• Coconut Milk: ½-cup
• Mustard Seeds: ¼-tea-spoon
• Bay Leaves: 1-Dried
• Dried Red Chilli: One
• Grated Ginger Paste: ½-Table-spoon
• Garlic Paste: ½-Table-spoon
• Onion: One Big Size (Paste in the mixer Grinder)
• Tomato: One Medium Size (Paste in the mixer Grinder)
• Cumin Powder: 1- tea-spoon
• Red Chilli Powder: ½-tea-spoon
• Turmeric Powder: ½-tea-spoon
• Whole Garam Masala: 2-Cardamoms, 2 Cloves and 1 Medium Cinnamon Stick
• Oil: 4 table-spoon
• Salt and Sugar to taste
• Water to Mix
• Garam Masala Powder: ¼-tea-spoon
• Ghee
Process of Making:
For making the process easier, I have essentially divided the process into three steps:
- Cleaning, peeling and preparing the Parwals:
This the first stage, where the parwals are washed properly and peeled alternately. This alternate peeling is done for a nice appearance. If you want to peel the whole skin, you can also do it. After peeling the skins, cut one terminal of the pointed end of the parwals, through which you can put a small spoon-end or small knife, leaving the other end intact. Then put the spoon-end (essentially a small sharp spoon) to take out the seeds and fleshy part inside the parwals and de-seed it. This will empty the inner contents of the parwals and make room for the stuffing. Keep the seeds along with the flesh aside as it will go again inside along with the stuffing. The de-seeded and peeled parwals are mixed with little turmeric powder, salt, and are kept ready for a shallow pan fry.
- Frying the Parwals, Preparing the stuffing and feeling the parwals with the stuffing.
Heat 2-tablespoon oil in a shallow pan and let it get heated. Fry the parwals slightly (not deep fry). You will notice, the parwals have shrunken a bit and loosened after frying. This will allow the stuffing to go inside easily. Then in the pan take one-tea spoon cumin seeds, green chillies, and the grated coconut along with the parwal seeds and fleshy contents, which you have kept aside. Sauté for 2-3 minutes and when the aroma of roasted coconut starts appearing, cool down the mixture and transfer it in a mixer grinder. Turn the mixer to convert the mixture into a paste (coarse). Once the coarse paste is ready, you can fill the parwals with this paste as a stuffing with the help of the spoon, through which you have de-seeded them.
- Gravy Preparation and Final Cooking:
The parwals are now ready to be put in the gravy. For the gravy, take 2-tablespoon oil in a wok and let it get heated. With the oil heated, add sugar. When the sugar starts changing colour, add cumin seeds, mustard seeds, bay leaves, dried red chilli, whole garam masala. Sauté for few minutes in a low flame. When the aroma of whole dry spices start coming, add onion paste and tomato paste together with a little salt to increase the temperature. Stir the contents thoroughly. When oil globules start appearing on the surface of the mixture, then add ginger and garlic paste and stir again for 5 minutes to balance the raw smell of garlic. Add coconut milk at this point along with turmeric powder, red chilli powder, cumin powder. Coconut milk functions as a good lubricant and prevents the masala from being burnt. Sauté them for 5 minutes and then add 3 cups of luke-warm water along with salt. Add the parwals and cover the lid of the wok. Keep the flame in a low temperature and simmer with low heat for 10-15 minutes depending on the quality of the parwals. Take care that the parwals isn’t over boiled and the stuffing comes out. Your delicacy of stuffed parwal is ready!!
Below I am giving a reference image of stuffed parwal recipe with shrimp. This is not prepared by me. This is just a reference image taken from one of the well known cooking blogs.
5. Mug Daler Pua/Sweets (Yellow Lentil Sweet Dish Preparation)
The Bengali Dashami
Evening is marked with friends and relatives visiting the house for the customs
of 'Vijaya doshomi' where the younger people stoop down to take the blessings
of the older and after that, there is a celebration of 'Sindur Khela' where
"Devi Durga" is fed with sweets. People in this occasion gorge on
bengali sweets prepared in the home and bought from shops, however, my
favourite is the Mug Dal Pua, which is a simple, mouth-watering recipe, served
from the delicacies of lentils, sugar, ghee and cardamom flavour.
Ingredients:
Preparation Time: 1 Hour
Servings: More than five People
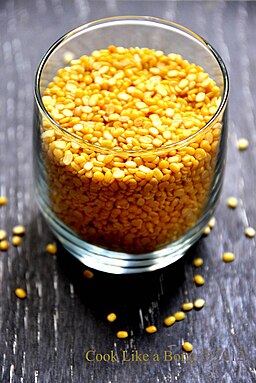
- Yellow Lentil/Moong Dal: 2 Cups (Dry Roasted, Cooled and then Soaked in water overnight)
- Cardamom Powder (1-2 tea-spoon)
- Saunf/Fennel Seeds-1 tea-spoon
- Sugar (2 Cups for the syrup preparation)
- Oil for deep fry ( preferably ghee or groundnut oil mixed)
- Ghee: 3 table-spoon
Process of Making:
- Two full cups of yellow lentil/moong dal is roasted in a skillet. When the nutty smell appears, take down the skillet and cool down the dal. Soak them in a bowl with 4 cups of water, overnight. Next morning, when the dal softens, then throw down the water and strain the dal with the help of a strainer. Make a smooth paste/batter of the soaked dal in a mixer grinder.
- Heat one tablespoon of ghee in a kadhai and when the ghee is heated, then give sauff and add the batter a good mix in the ghee with a low flame heat. Stirr generously and while stirring, add a little sugar (pinch and cardamom powder). Take care so the mixture does not stick in the bottom. When the mixture starts, turning little reddish then put the gas flame of and take down the mixture. When the contents are slightly cold, then roll the mixture in the palm and roll into small balls. Press the balls in the palm a little in the middle and fold the sides to give it a small bowl shape. Do not allow the mixture to cool down fully otherwise the mixture becomes hard and it becomes difficult to give shape. Keep the "Puas/ Sweets' aside and prepare the sugar syrup.
- In a deep-bottomed pan, add 3 cups of water and 2 cups of sugar. Boil the water and when the sugar melts fully and the mixture becomes thick and syrupy, turn off the flame and check the thickness of the syrup by dipping one spoon. If drop is standing on one side of the spoon, the consistency is perfect. If you think, you need to increase or decrease the thickness, adjust accordingly by adding sugar or water and giving it a second time boil.
- For frying the Puas/Sweets, take oil in a pan for deep-frying. When oil gets heated, start frying the Puas, one by one until it is fried properly. Take care it does not gets broken. Soak the excess oil with a kitchen paper towel, and then dip the Puas slowly in the sugar syrup, already prepared. Turn both the sides of the Puas with utmost care and let them remain in it for 45 minutes. The Puas are ready for serving.
I hope I have been able to detail the recipes neatly, by narrating the pros and cons. I have narrated these accounts from my experiences, the difficulties, which I came across, while preparing these mouth-watering recipes. However, I am sure, these dishes are sure to drool your taste-buds and all you food lovers, are going to love these recipes. Try them at home, and share with me your experiences. Write to me and let me know about your feelings!!
Bon Appétit!!


